Some users can also admire this one here, especially whilst new gadgets turn out to be had on your modern favorite sport you’re addicted to playing!
But did you know you may help defend your identification by using hiding any iPhone notifications?
In this submission, we’ll inform you why you have to flip off your notifications to beautify your protection online.
We’ll also teach you the way to show off previews, cover signals, and other messages.
Why it’s critical to hide notifications on your iPhone
It may not look like a big deal but turning off your telephone notifications can make you safer and more efficient. Here’s why:
You can keep away from distractions. With your phone constantly humming with notifications, it’s unsurprising if you discover it difficult to avoid taking a peek each now and again.
Aside from that, your boss and co-workers won’t admire it if they preserve hearing your phone go off.
You can defend your PIN. If you’re signing into an online account with -component authentication, you’ll be getting your PIN thru your smartphone.
Sometimes, while you operate your credit score card, they also ship you a one-time PIN to complete transactions.
Those PINs come to be uncovered by hackers on the grounds that they appear as notifications to your cell phone. You can hide non-public records.
We’re not just talking about approximately sensitive snapshots or correspondence. You should take into account employer emails or texts intended in your eyes simplest.
You can thoughts your own commercial enterprise. Everyone has the right to digital privacy. Messages coming into your smartphone should be read via you and your handiest.
And what in case you’re planning a marvel birthday party for a chum and a notification approximately it pops up on your smartphone? If everybody else sees it, then you would have ruined a good surprise.
How do notifications paintings on iPhone
Of path, notifications are not all terrible news. In fact, they may be clearly beneficial that will help you keep your existence heading in the right direction.
If you’re ready for information approximately a vital circle of relatives or businesses to be counted, turning them on can be available.
What we have to examine is filtering out the messages acting on our telephones.
Are a maximum of them vital? Or are you able to live without some? The first step is to test how many notifications you’re commonly getting, and who’s been sending them.
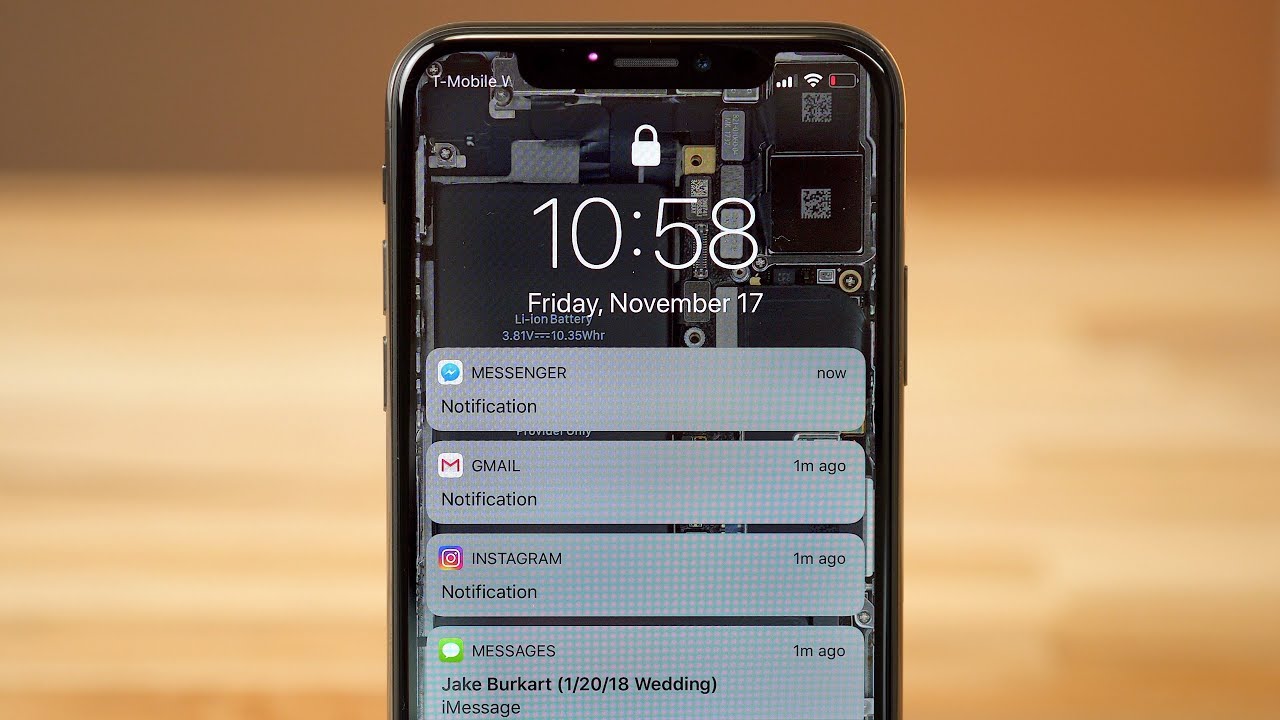
How to see all notifications on your iPhone
Here’s a brief and clean way you can see all the notifications on your smartphone:
- Swipe down from the pinnacle middle of any display to get to the Notification Center
- Scroll up to peer older notifications
- Close the Notification Center by means of swiping up from the bottom
If you’re using iPhone 8, iPhone 8 Plus, iPhone 7, iPhone 7 Plus, iPhone 6s, iPhone 6s Plus, or iPhone SE, you can additionally close the Notification Center by using pressing the Home button
How to reply to notifications on your iPhone
Follow those steps to quickly reply to or dismiss notifications on your telephone:
- You must first tap on the institution notification in case you need to see man or woman notifications from a group.
- To view or respond to unique notifications, swipe right on them and tap them open.
- Tap Show Less if you want to close a group notification.
What occurs when you cover notifications on an iPhone
It doesn’t suggest that the message or alert is long gone when you hide any notifications. You will still receive these messages when you move into a particular app or your iMessage.
For instance, new texts on your iMessage will nevertheless appear in chronological order.
And whilst you open man or woman apps, these indicators must nevertheless be to be had at the notification tab.
How do I see notifications once they disappear
If you need to know wherein iPhone notifications are stored, the answer is quite simple this one here.
The history of your iPhone notification may be traced to the Notification Center. And you can try this just by swiping up after tapping any part of the screen or the Home Screen.
It’s one of a kind when your notifications clearly disappear without you customizing the indicators.
Here’s how you could see the notifications again once they disappear on their personal:
Update your iOS. Go to Settings > General > Software Update.
You won’t be receiving notifications due to the fact your operating gadget is outdated. When the choice to replace is available, install this replacement.
Do now not use Show in History. Go to Settings > Notifications > Show in History.
If this is becoming one, then that’s why you’re no longer seeing your indicators. Turn it off in case you need them to appear on your display screen again.
Individually test each app’s notifications. Go to Settings >
Notifications. Then select an app. If you by accident switched off notifications, it must display right here.
Don’t use Do Not Disturb. This is a feature that mutes or blocks your notifications.
To check if it is switched on, go to Settings > Do Not Disturb this one here. Switch on once more in case you need to peer notifications.
Hiding notifications is a protection issue
When you disguise your notifications, now not handiest are you making yourself unfastened from constant distractions but you are also preventing a capacity protection danger.
Our incoming messages may additionally incorporate personal facts we must shield as that is our virtual proper.
If you have got antivirus software on your laptop, it makes feel to have an equal stage of protection to your telephone, right?
Maybe you even use your mobile telephone extra than your pc, which makes it more precious but increases its vulnerability.